Setting up an embedded server in eclipse.
Part 1: Setup the server.
Table of content:- Install eclipse IDE
- Creating a web server project
- Configuring the project to be a web plugin
- Run configuration
- Creating another project and mapping it to the web
- Adding a javascript framework as a library
- Moving library projects out of workspace
- Creating a web plug-in without eclipse.
Eclipse has an embedded server. You don't have to install any other external web server (such as Apache) to launch your web files. All you need to have is eclipse. And it also has some benefits over other servers.
When using an external server we'll have the following problems:
- Copying web files from the workspace to the server mapped folder
- Having a javascript library inside your project
- Web server is separate form your IDE
Eclipse for Java EE developers has an embedded web server named jetty. We will launch it as a plugin in equinox framework. It is an eclipse project. Starting from eclipse version 4 it is built-in into the package. It allows us to launch our web server as a set of several plugins (which could be just plain file directories), and map them into different url addresses. For example, we have a javascript library of jquiry. We will create a plugin for it and map it to our server to /jquirey url. Our main pages/code could be located in different directories and mapped to another urls.
Sounds great? Let's implement it.
1. Installing Eclipse
You must have java to run Eclipse. If you don't have it, download the java distribution from java download page, and then install it.
Choose a folder to be your workspace. It's a pretty standard step if you are familiar with eclipse. Your project would be located there.
I will use d:/work directory.
2. Creating our first web project.
Let's create a web project. Remember, the whole workspace would be mapped into your http://localhost:port URL, and our projects
would be plug-ins to that server.
Click File->New project menu.

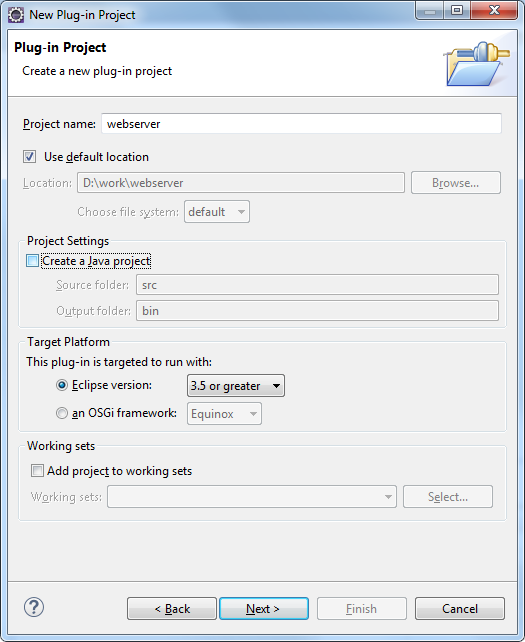
 Specify the name of the project. Let's name our first project "webserver". Uncheck Create Java project checkbox
because we won't create any java servlet code. Click Next.
Specify the name of the project. Let's name our first project "webserver". Uncheck Create Java project checkbox
because we won't create any java servlet code. Click Next.
 In the Content dialog we shouldn't change anything. Click Next.
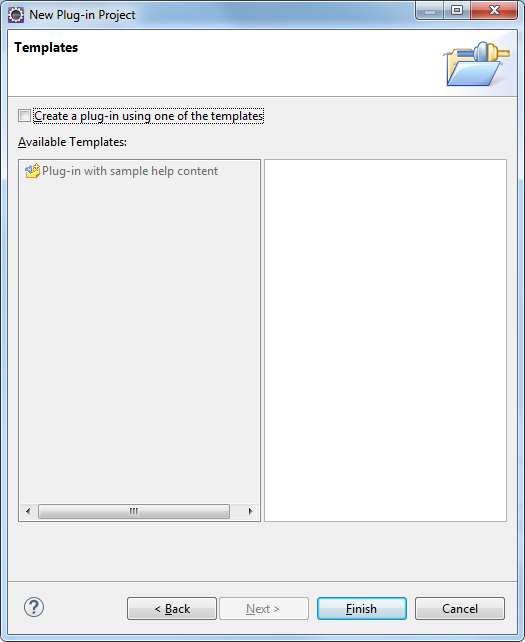
 Uncheck Create a plug-in using one of the templates checkbox. We don't need any project template. Click Finish.
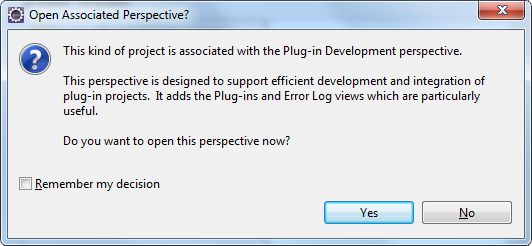
 Eclipse will ask us if to switch to a plug-in development perspective. Say Yes. We can change the perspective view at any time.
 The project has been created. Later it will become one of our web server plug-in.
Lets' make a directory to be mapped on the web. Let's choose the name "web", but you can use any name you like. Right click on the project - select New → Folder menu.

Add our first html file to that directory.
Click New → Other... → HTML File.
Name the file "index.html". Click Finish button.
 Fill the html file with some content.

But that's not enough. We have to make some manipulations on the project and setup the run configuration to make it work.
3. Setup the project to be a real web server plug-in
Double click on META-INF/MANIFEST.MF file. You will open project configuration editor. The project must be a singleton to be be a web server plug-in. So check This plug-in is a singleton checkbox. Go to Extensions tab of the configuration editor.
Click Add.. button on the All Extensions panel in that tab to extend the project nature.
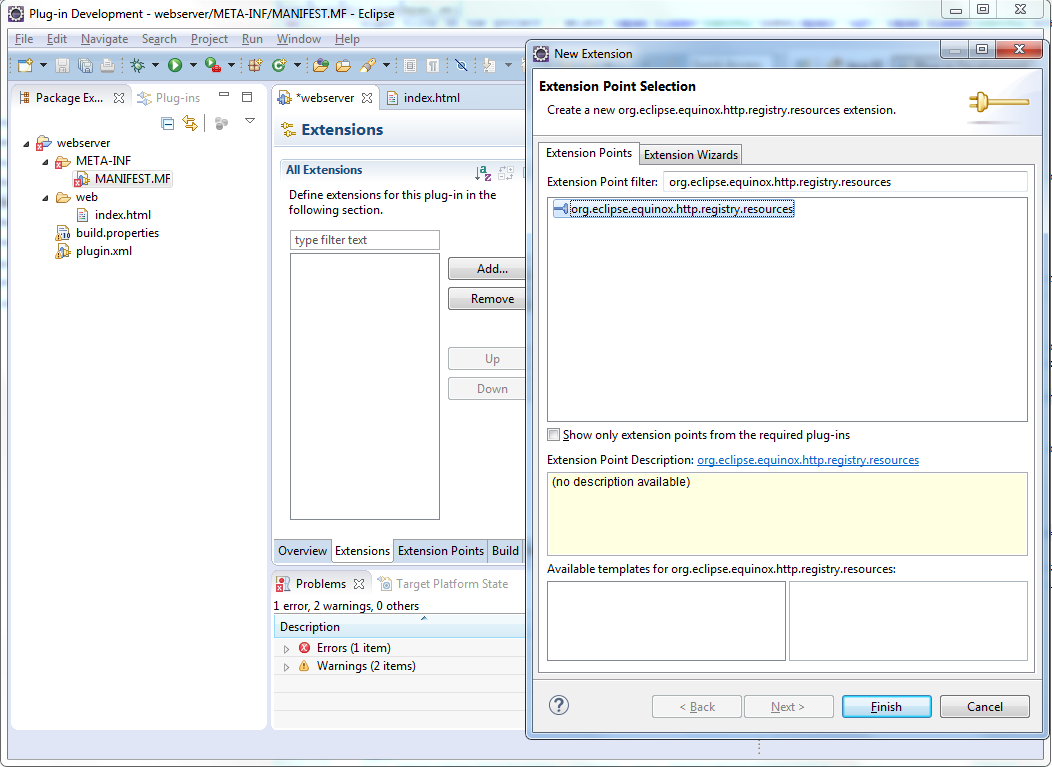
Uncheck Show only extension points from the required plug-ins checkbox in the New Extension dialog.
Type in org.eclipse.equinox.http.registry.resources in the Extension Point filter input. Select the item appeared in the list.
Then click Finish.
 Then a warning dialog will appear. This extension should be added to project dependencies. Click Yes.
 If the project configuration tab (a tab named webserver) hasn't been saved, save it. Otherwise you will get a
project error - The plugin must be a singleton to be a plug-in extension.
Save the webserver configuration (Ctrl + S).
If the project configuration tab (a tab named webserver) hasn't been saved, save it. Otherwise you will get a
project error - The plugin must be a singleton to be a plug-in extension.
Save the webserver configuration (Ctrl + S).
Everything that previous action has done is created the plugin.xml file. It represents the nature of plug-in.
We have changed the nature of the project by adding an extension point. Now it extends org.eclipse.equinox.http.registry.resources
servlet and has become a web server.
Configure the project to map the web folder to a web url address.
This is done by editing plugin.xml file. Open plugin.xml tab in the configuration area.
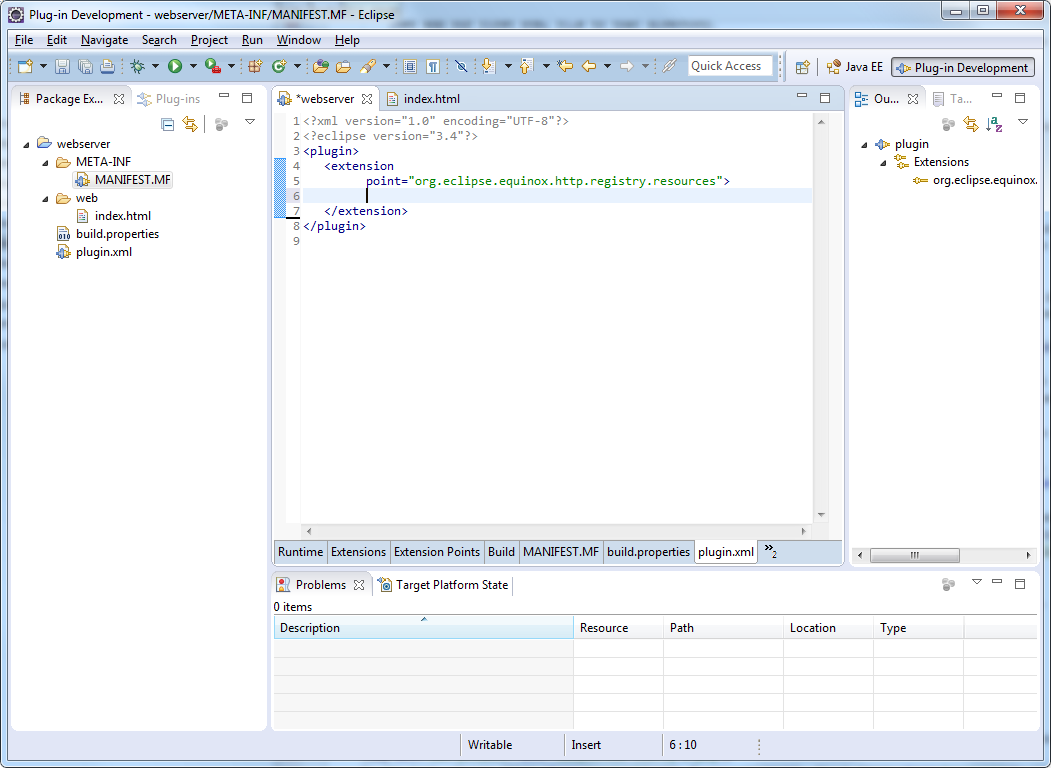 We should add the following text into the <extension> tag:
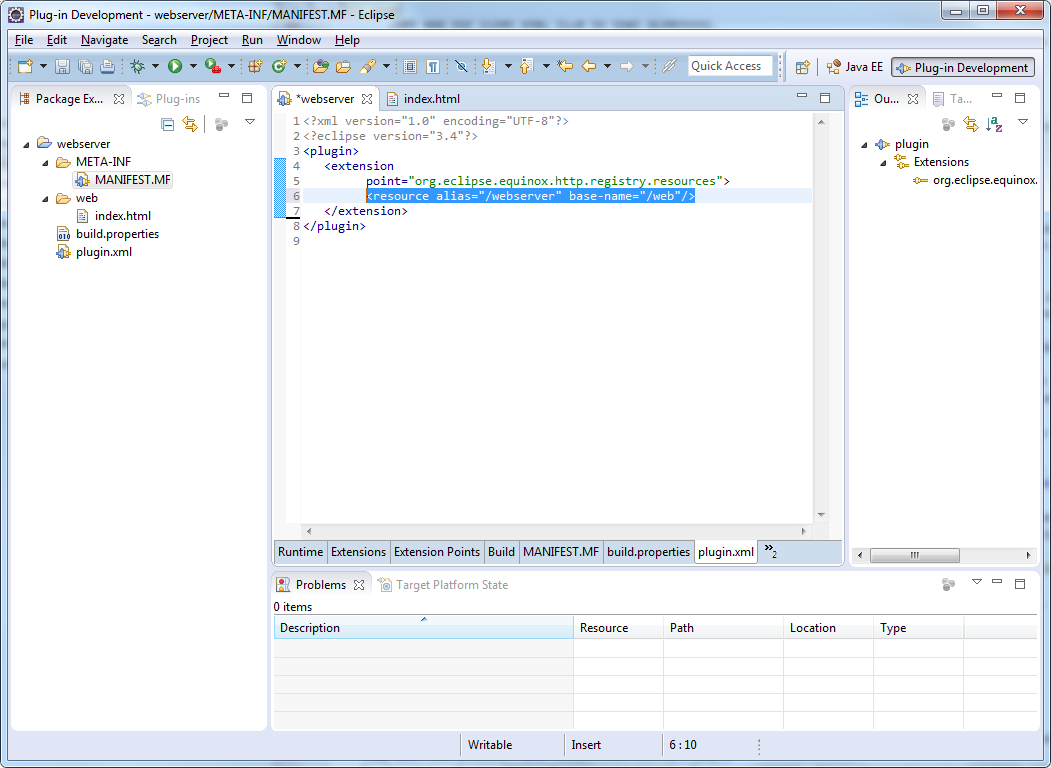 This option specifies that web folder to be mapped to /webserver URL.
Congratulations! The project setup is done. But should configure the plug-ins host to run the server.
4. Setup the environment to run our server plugin (run configuration).
Open Window → Preferences menu.
 In the dialog appeared, select Plug-in Development → Target Platform option on the left side.
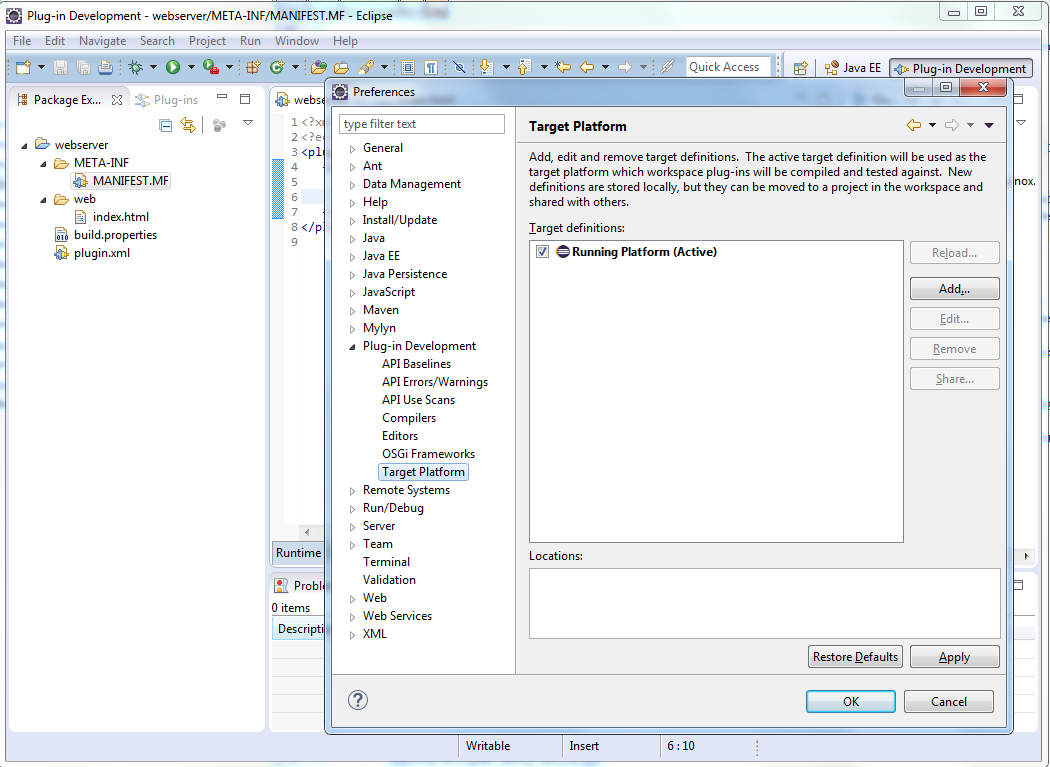 Select Running Platform(Active) option, then click Edit.
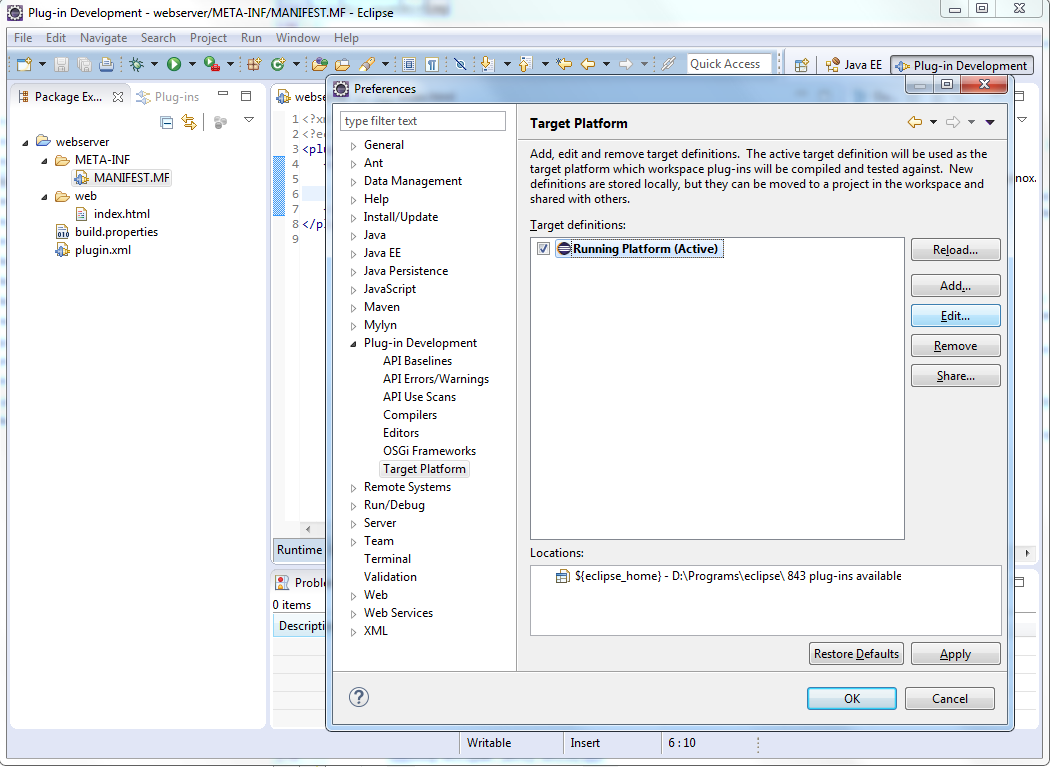 In the next dialog, select Content tab. See there are 843 plug-ins launched when you run the host.
We don't need most of them.
In the next dialog, select Content tab. See there are 843 plug-ins launched when you run the host.
We don't need most of them.
 We should Deselect all and check only the plugins listed below:
- javax.servlet
- javax.xml
- org.apache.felix.gogo.runtime
- org.apache.felix.gogo.shell
- org.eclipse.core.jobs
- org.eclipse.equinox.common
- org.eclipse.equinox.console
- org.eclipse.equinox.http.jetty
- org.eclipse.equinox.http.registry
- org.eclipse.equinox.http.servlet
- org.eclipse.equinox.registry
- org.eclipse.jetty.continuation
- org.eclipse.jetty.http
- org.eclipse.jetty.io
- org.eclipse.jetty.security
- org.eclipse.jetty.server
- org.eclipse.jetty.servlet
- org.eclipse.jetty.util
- org.eclipse.jetty.webapp
- org.eclipse.jetty.xml
- org.eclipse.osgi
- org.eclipse.osgi.services
This is hard, but you have to do it. No other plug-ins should be checked. Exactly these 22.
If one is missed the server wouldn't launch. Extra plugins will interrupt the work of the server. So please be careful.
 When the plugins are checked, click Finish.
 The server host has been updated. This was a one-time job. Later it will be easier.
 In the Run Configurations dialog, choose OSGi Framework.
Click New launch configuration icon on the top.
In the Run Configurations dialog, choose OSGi Framework.
Click New launch configuration icon on the top.
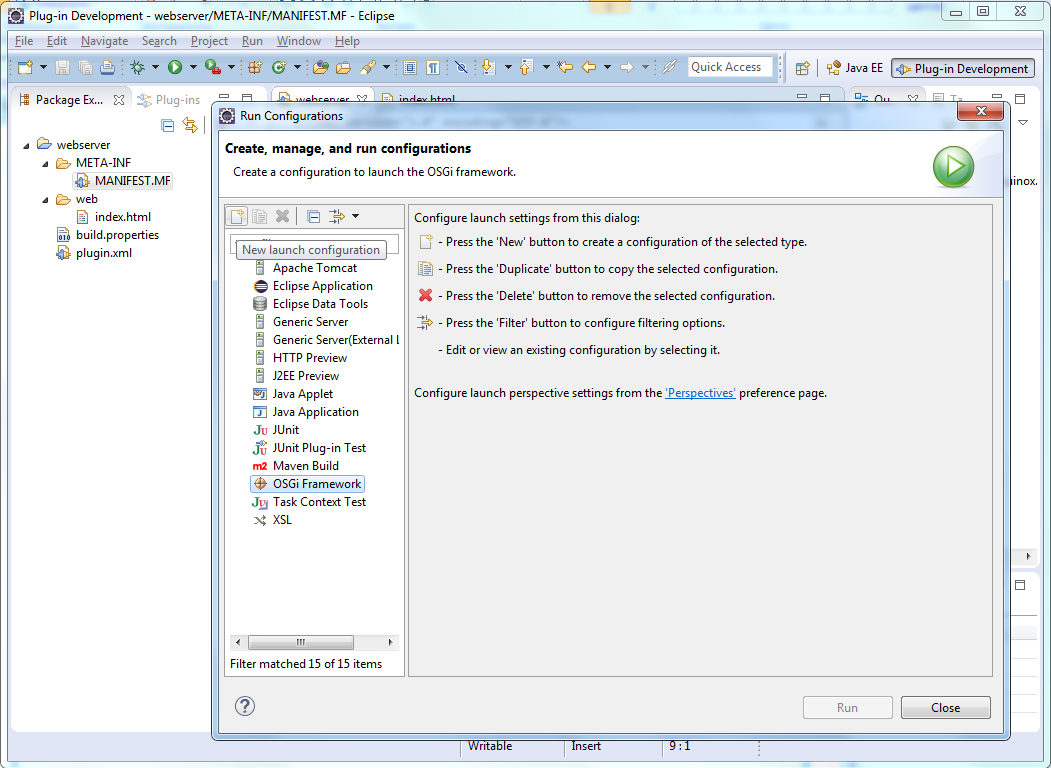 Name the configuration "server".
 Go to the Arguments tab, add -Dorg.osgi.service.http.port=8080 argument to the list. This argument is required.
It will specify the port number used by the server. Note there should be a space between arguments.
Go to the Arguments tab, add -Dorg.osgi.service.http.port=8080 argument to the list. This argument is required.
It will specify the port number used by the server. Note there should be a space between arguments.
 On the Settings tab, select Clear the configuration area befere launching checkbox. This option will not let you to launch
the server twice. The launch will fail if the server is already launched. It is optional.
On the Settings tab, select Clear the configuration area befere launching checkbox. This option will not let you to launch
the server twice. The launch will fail if the server is already launched. It is optional.
 Click Run.
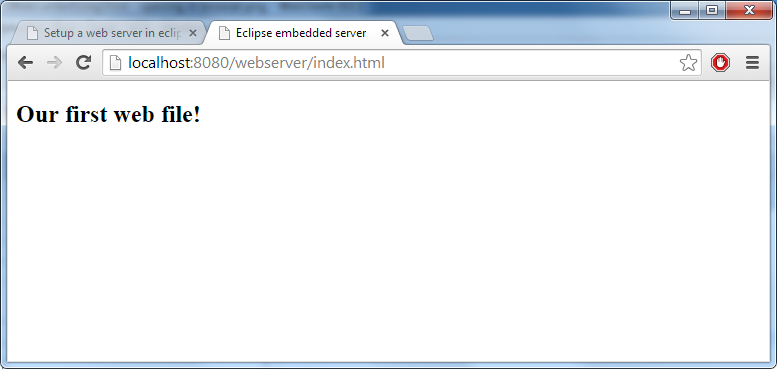
 Let's check everything is OK is by loading http://localhost:8080/webserver/index.html in your browser.
Please note that you should specify the exact url of the main page. Unlike other servers,
the server doesn't have default page setting and it wouldn't load index.html by default.
Let's check everything is OK is by loading http://localhost:8080/webserver/index.html in your browser.
Please note that you should specify the exact url of the main page. Unlike other servers,
the server doesn't have default page setting and it wouldn't load index.html by default.
 Let's update our first page. We don't have to restart our server. The server reload the changes immediately.
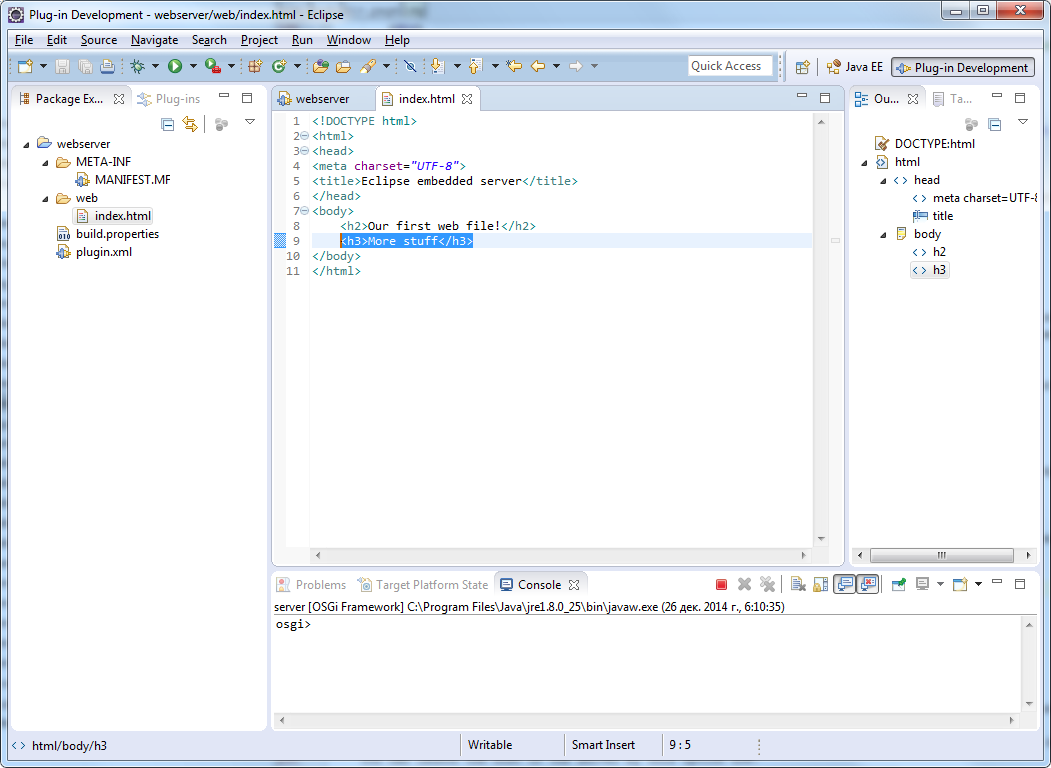 Reload the browser page. The changes has appeared.
 Stop the server. This is done by clicking Terminate button in the Console view.
 Note that once you have run the server, a shorthand icon appeared in the Run button menu in the toolbar.
You can launch the host of the server by this option now.
Note that once you have run the server, a shorthand icon appeared in the Run button menu in the toolbar.
You can launch the host of the server by this option now.

Well, our first web project has been created. Some more cool stuff about eclispse web server is on the next page.