Setting up an embedded server in eclipse.
Part 3: exploring the benefits of a plug-in server
Table of content:
7. Move library projects out of workspace
Workspace is the place to code. Libraries that we use do not change over time and we shouldn't keep them here. We can move our javascript framework outside from our workspace to keep it clean.This could be done by exporting the project to a jar and putting it to another directory.
Unfortunately, eclipse doesn't allow exporting projects that doesn't have java nature (as our plug-in projects) to a jar in natural way. But jar is just a zip archive and all we need is to put the content there.
Now we have 3 projects mapped to the same server.
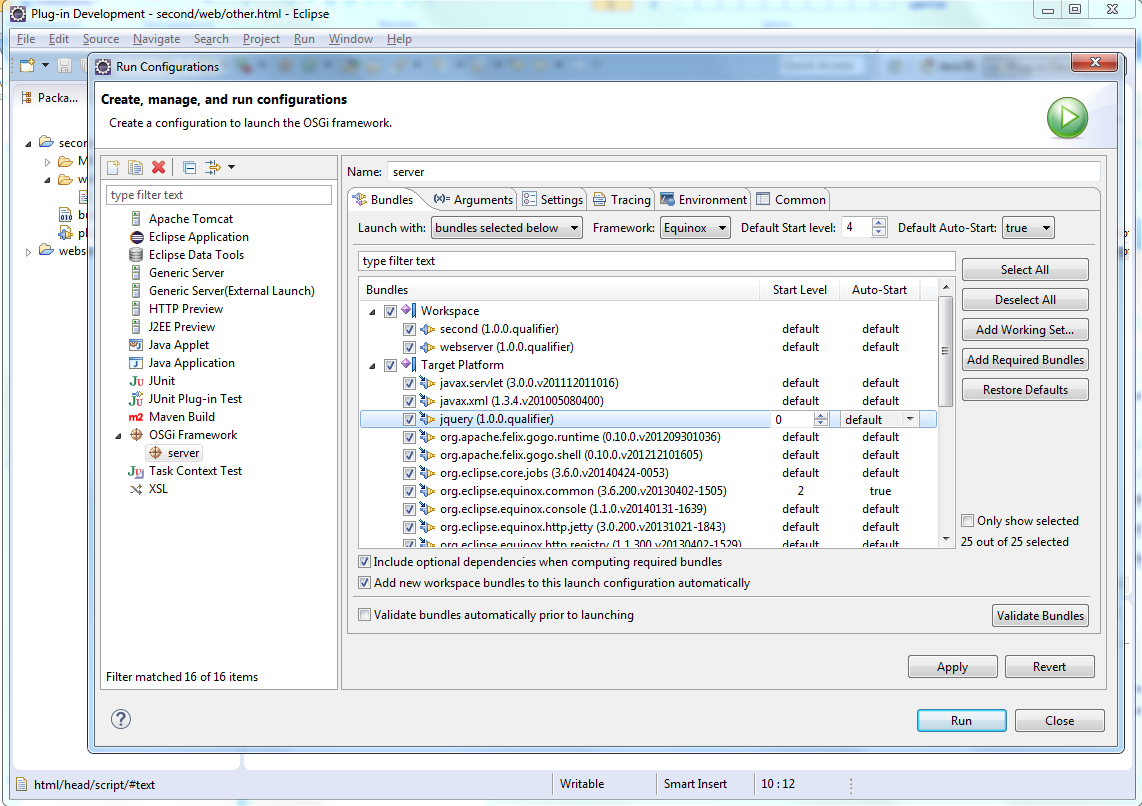
Let's see the web host (osgi) content. Click Run -> Run Configuration menu.
You will see that all workspace projects have been added to the server automatically.
We have 3 plug-ins in the workspace and 22 plugins performing web server work.
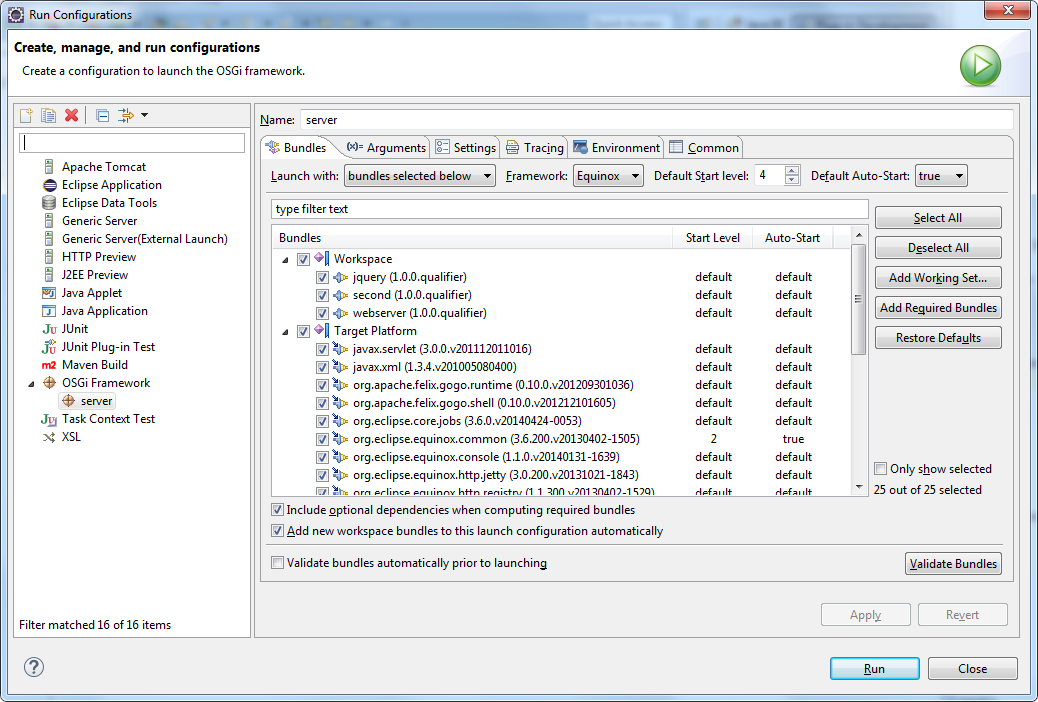
Our task is to move the jquery project from the workspace into Target Platform group since it is a library.
Close the dialog. That was just an overview of what plug-ins are used.
Close the dialog. That was just an overview of what plug-ins are used.
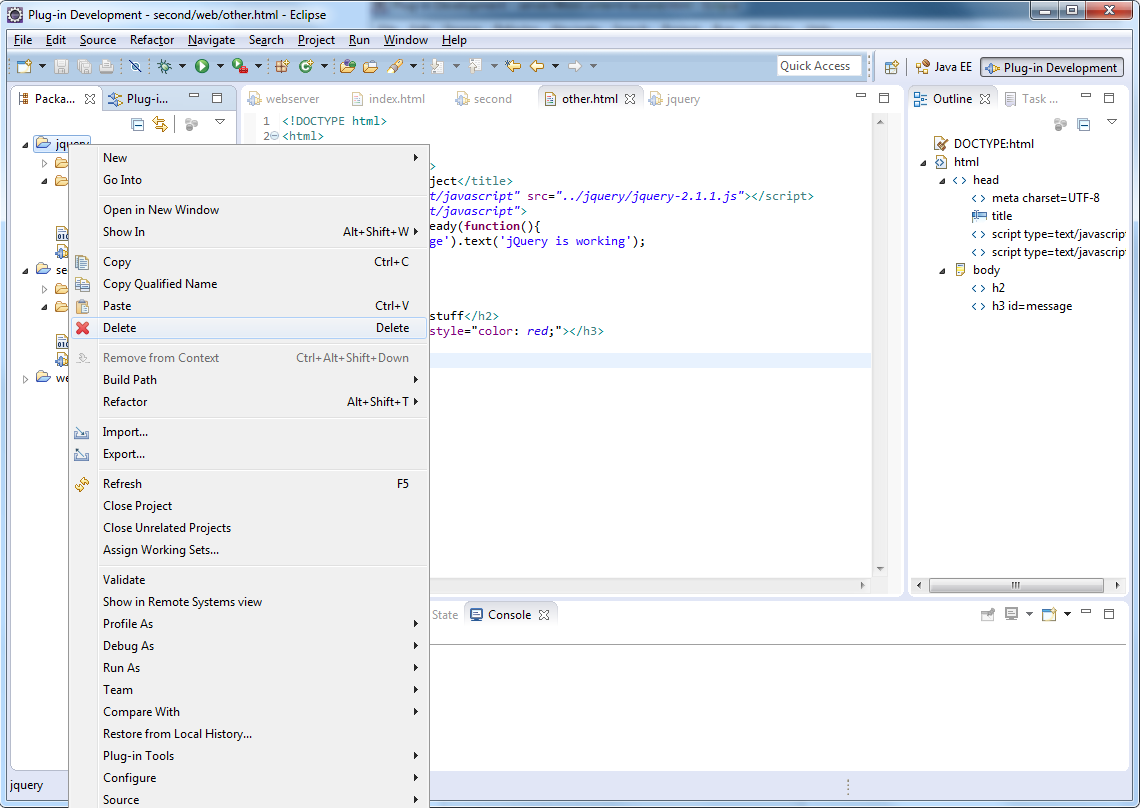
Open jquery project location. Select META-INF, web directories, and the plugin.xml file.
Then activate right - click menu. Select Export option.
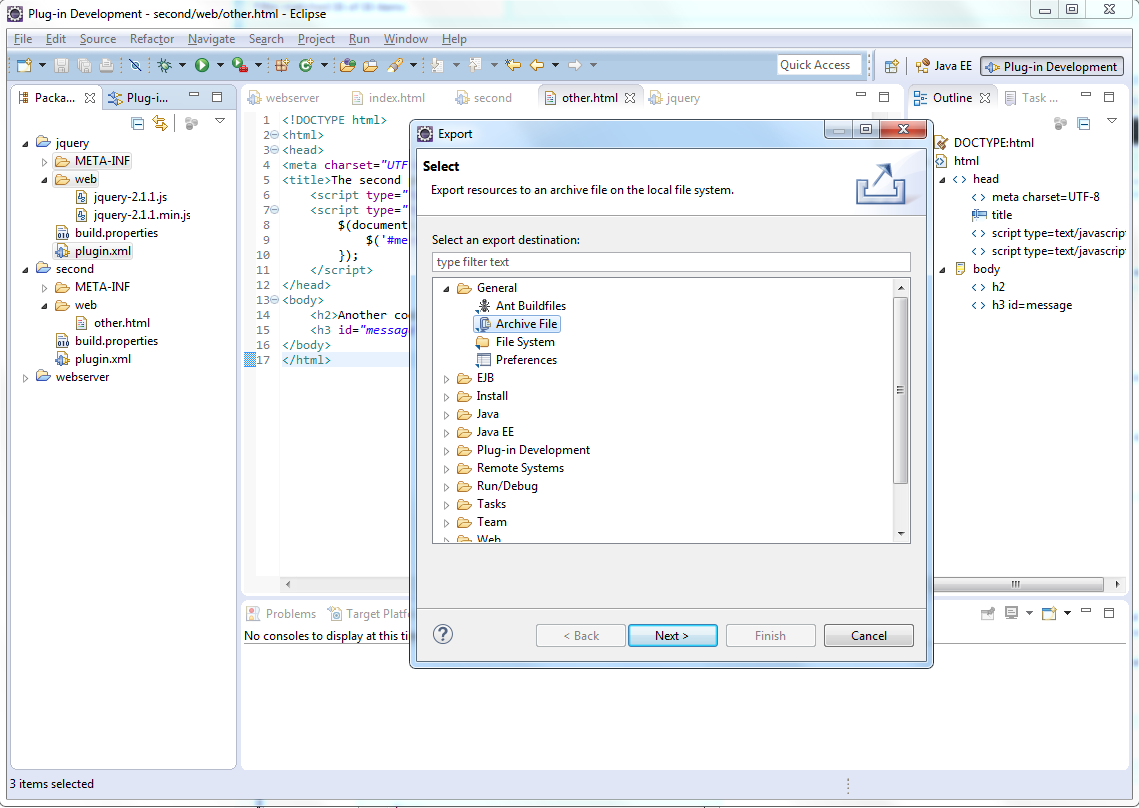
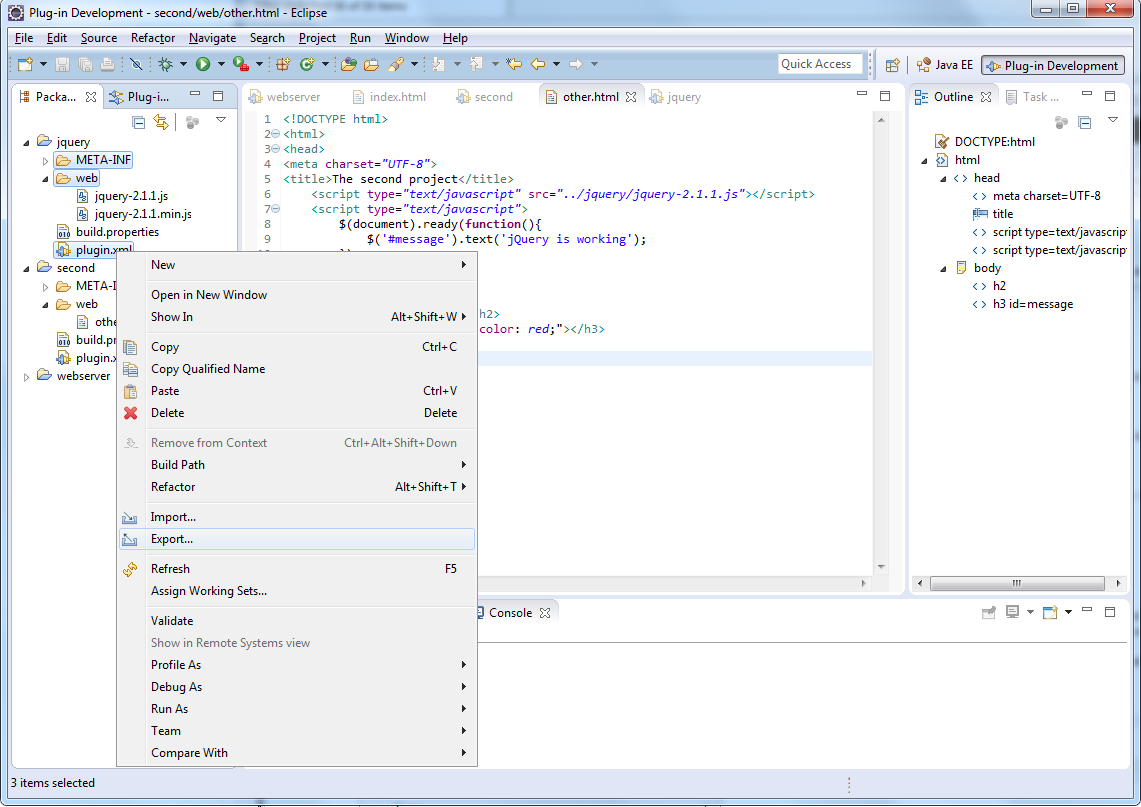 In the Export dialog window, choose General - Archive File option.
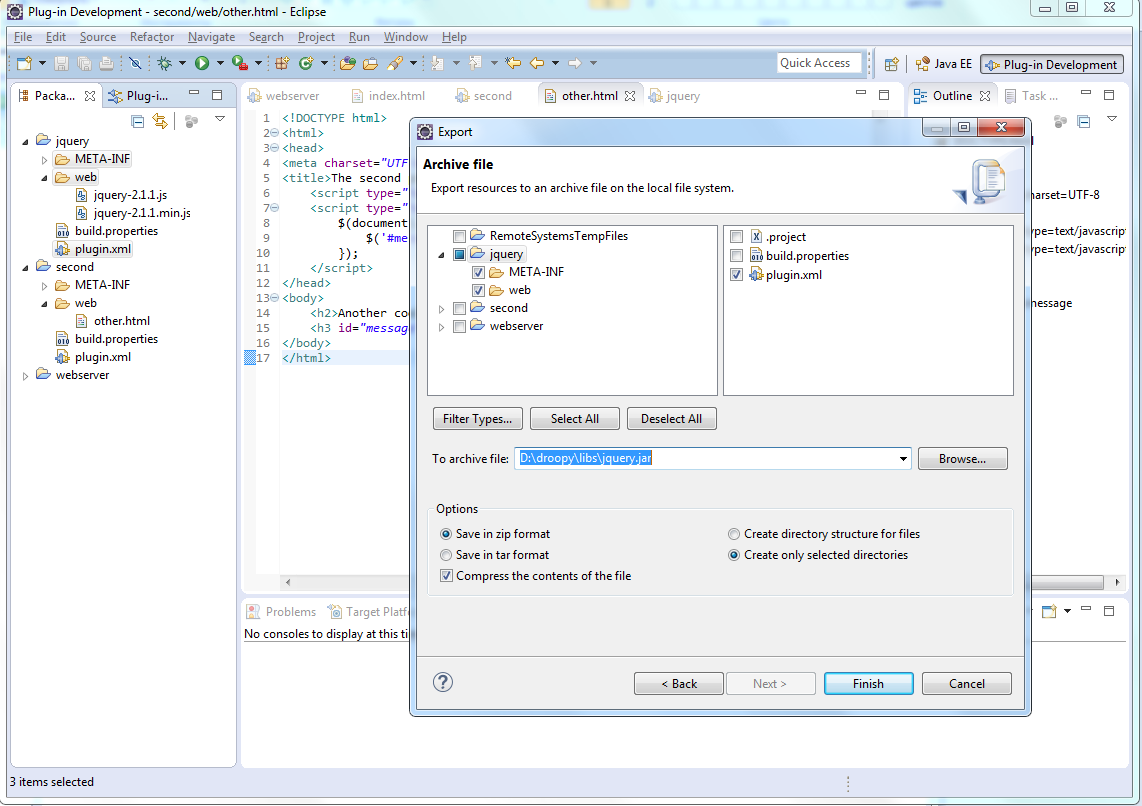
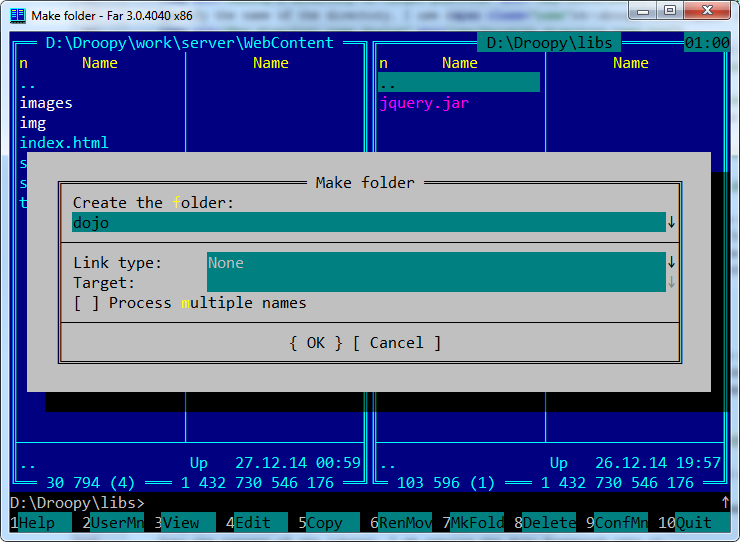
 Create a new folder in your disk that will contain web server libraries. It should be empty.
You should specify the directory and the file names in the dialog.
In my case the directory is D:\droopy\libs and the file name is jquery.jar.
Select Create only selected directories option.
Then click Finish.
Create a new folder in your disk that will contain web server libraries. It should be empty.
You should specify the directory and the file names in the dialog.
In my case the directory is D:\droopy\libs and the file name is jquery.jar.
Select Create only selected directories option.
Then click Finish.
 The library has been created.
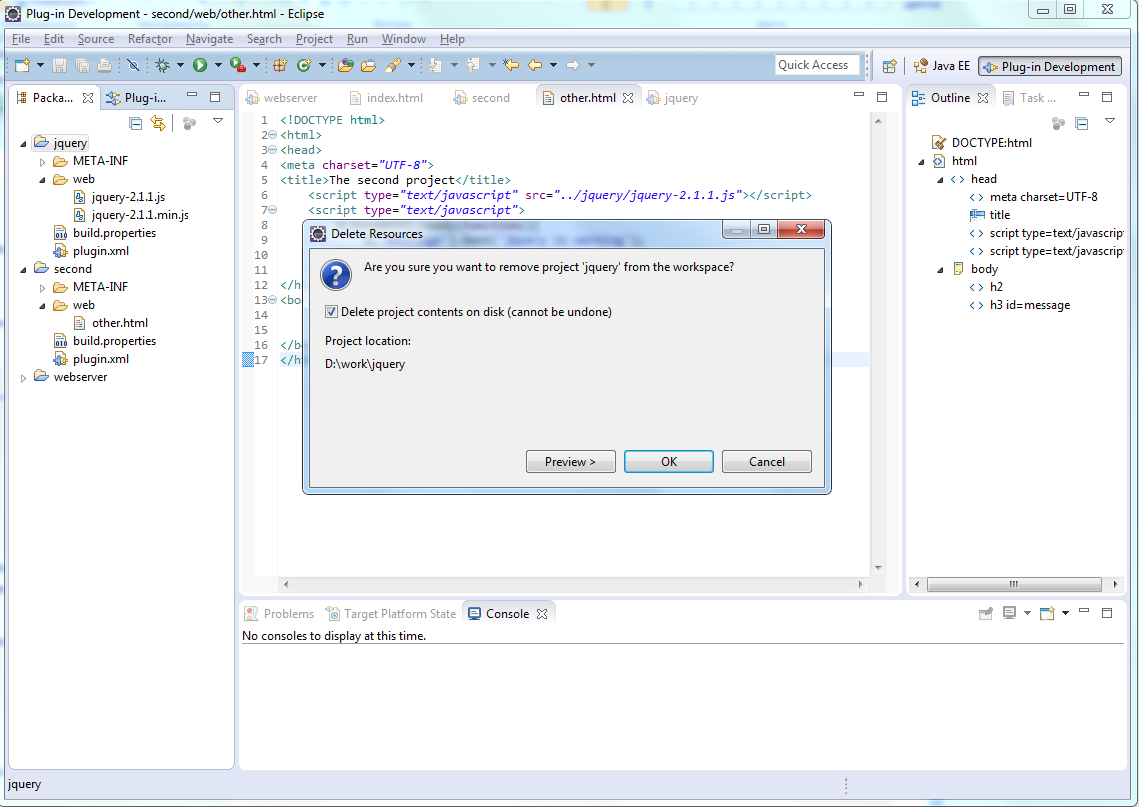
Since we have exported the project into another place we can delete it from the workspace.
 A warning dialog will appear. Check Delete project contents on disk (cannot be undone), then
click OK.
A warning dialog will appear. Check Delete project contents on disk (cannot be undone), then
click OK.
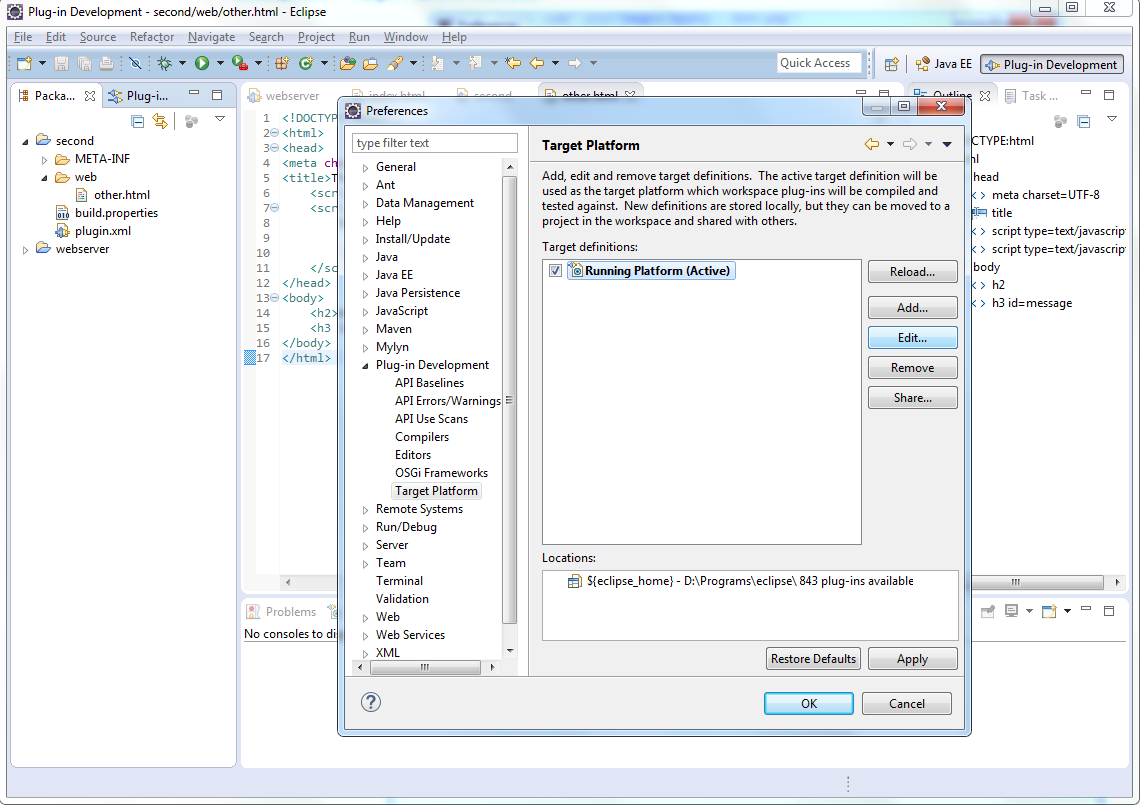
 Now we should setup the run environment to include the exported jar. Workspace project plug-ins are added automatically but
any other plug-in should be added explicitly.
Now we should setup the run environment to include the exported jar. Workspace project plug-ins are added automatically but
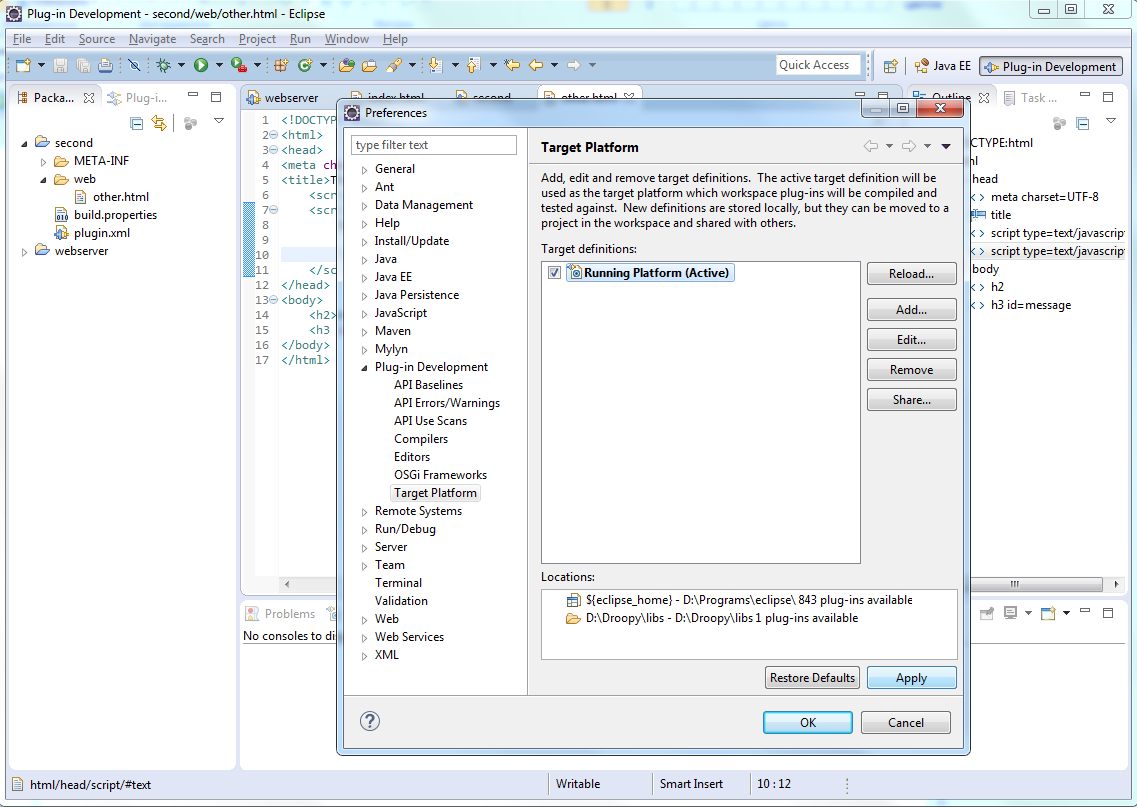
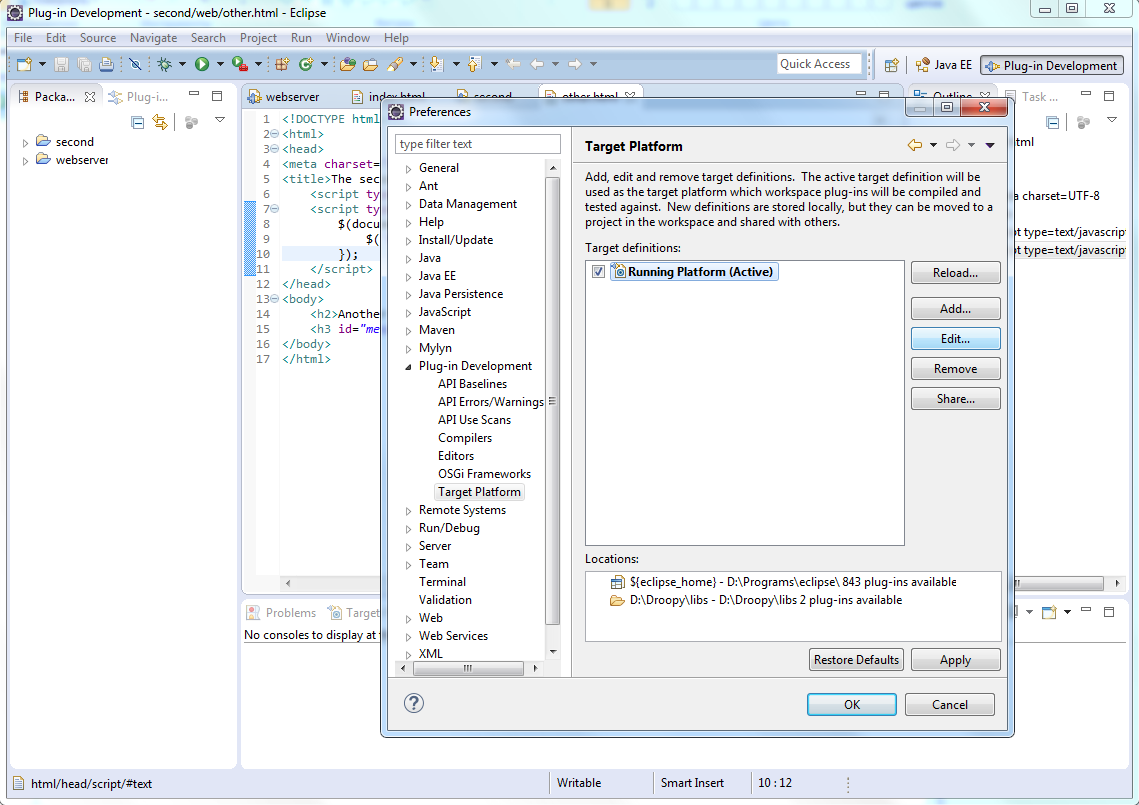
any other plug-in should be added explicitly.Select Window → Preferences menu. In the dialog, select Plug-in Development → Target Platform. We have our configuration named Running Platform. Select it and click Edit.
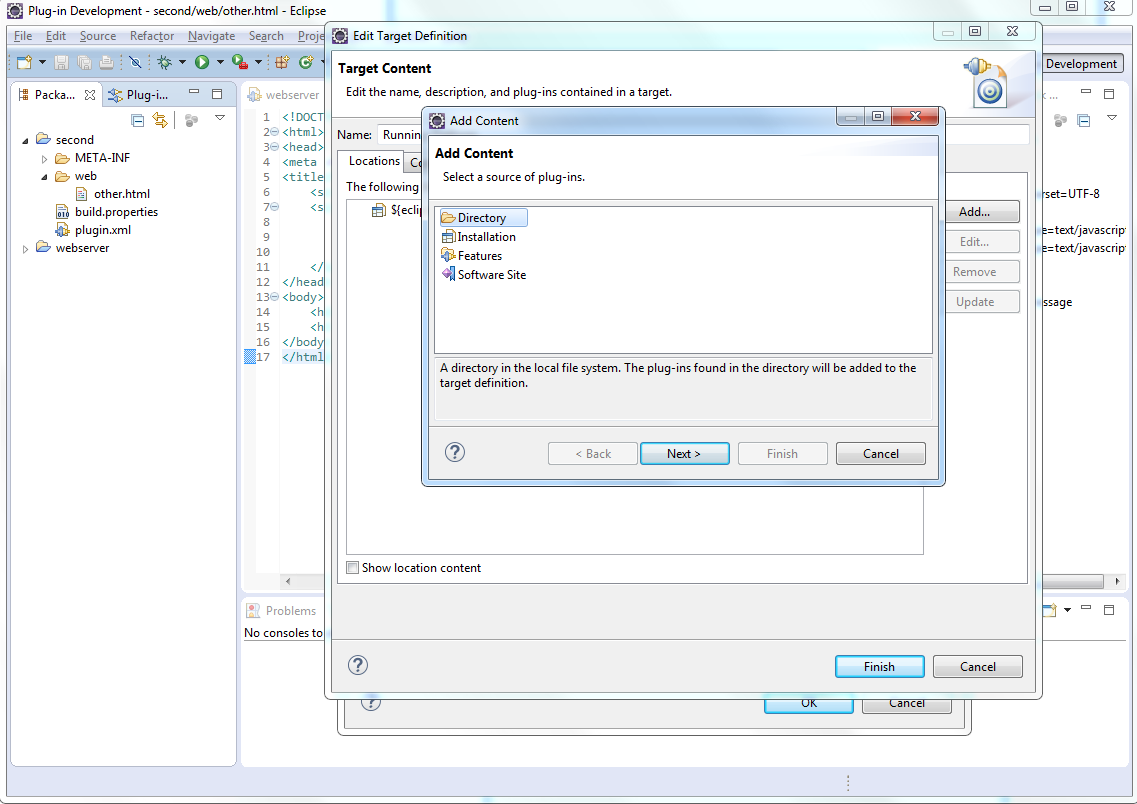
 Click Add button to add another directory which would contains plug-ins.
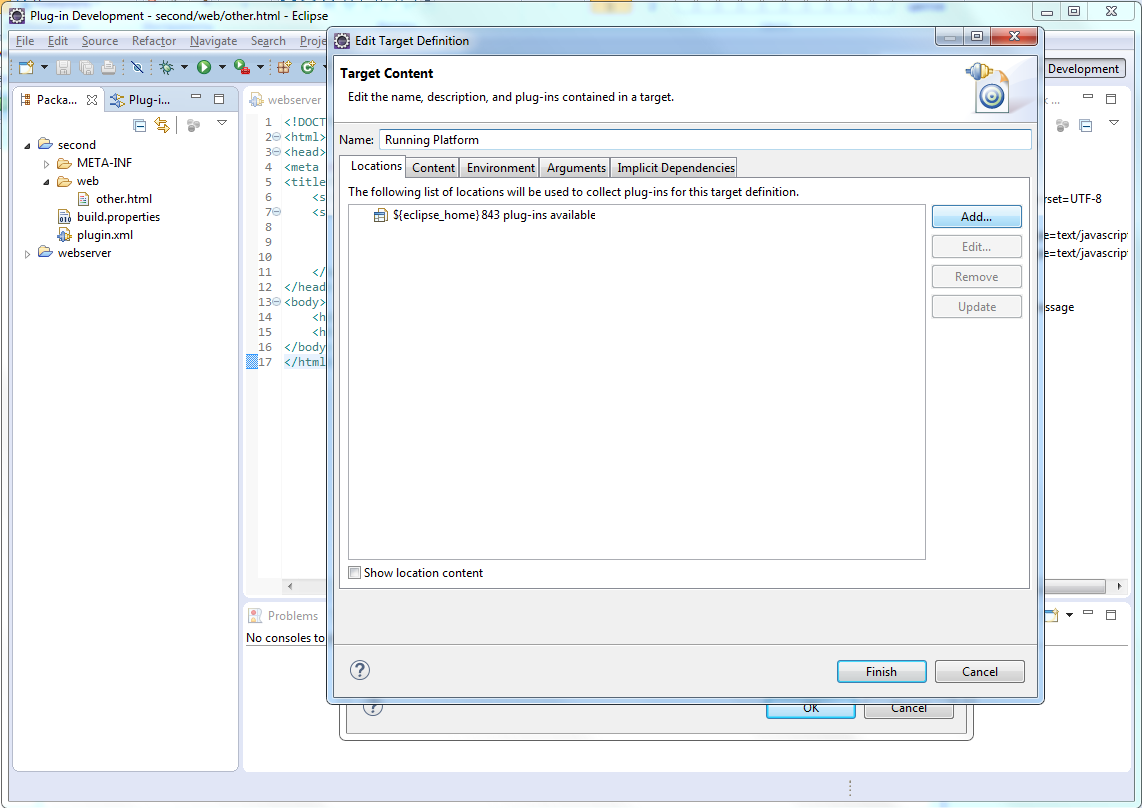 In the Add Content dialog, choose Directory.
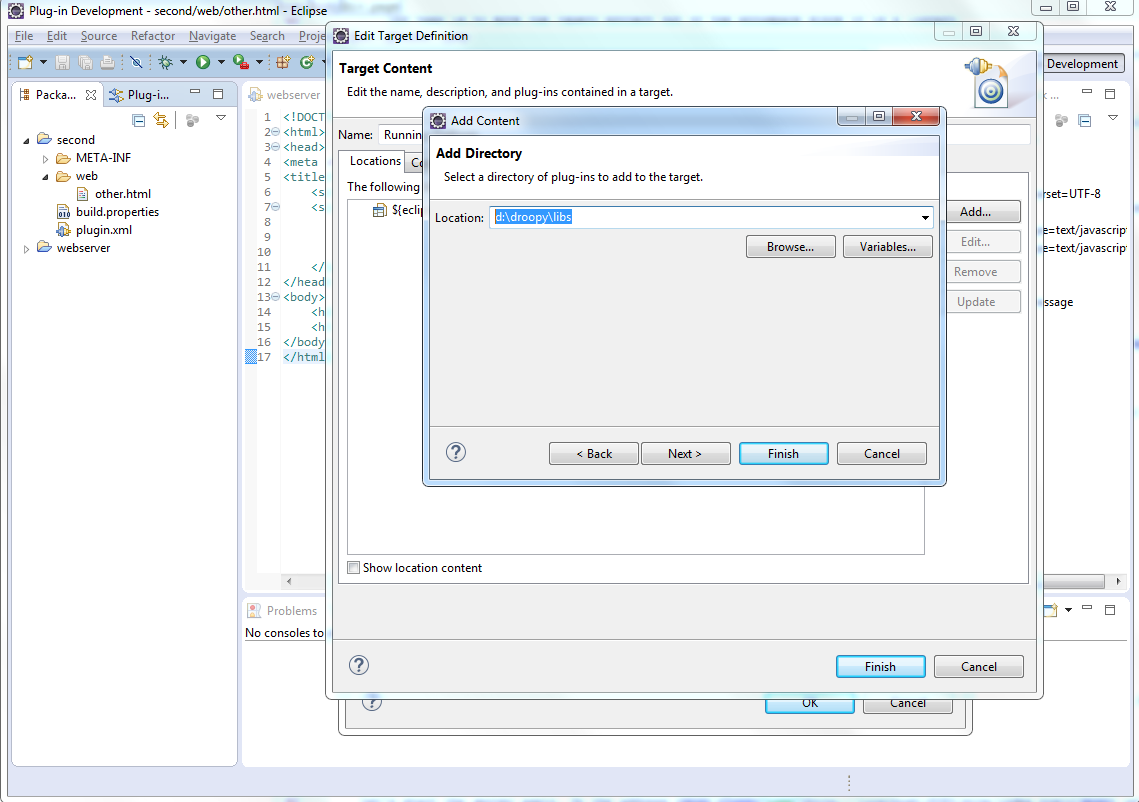
 Specify the name of the directory. I use d:\droopy\libs (the directory containing the exported jquery library).
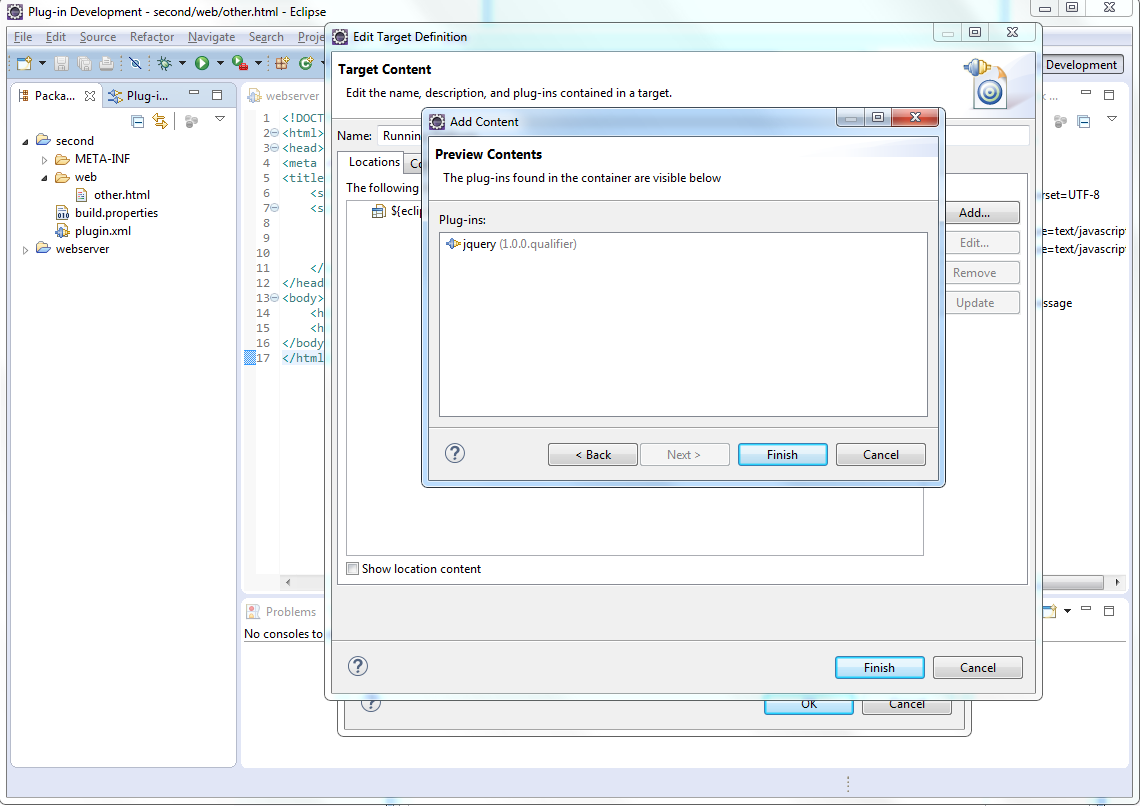
 Note eclipse has found that the directory contains the jquery plug-in. Click Finish.
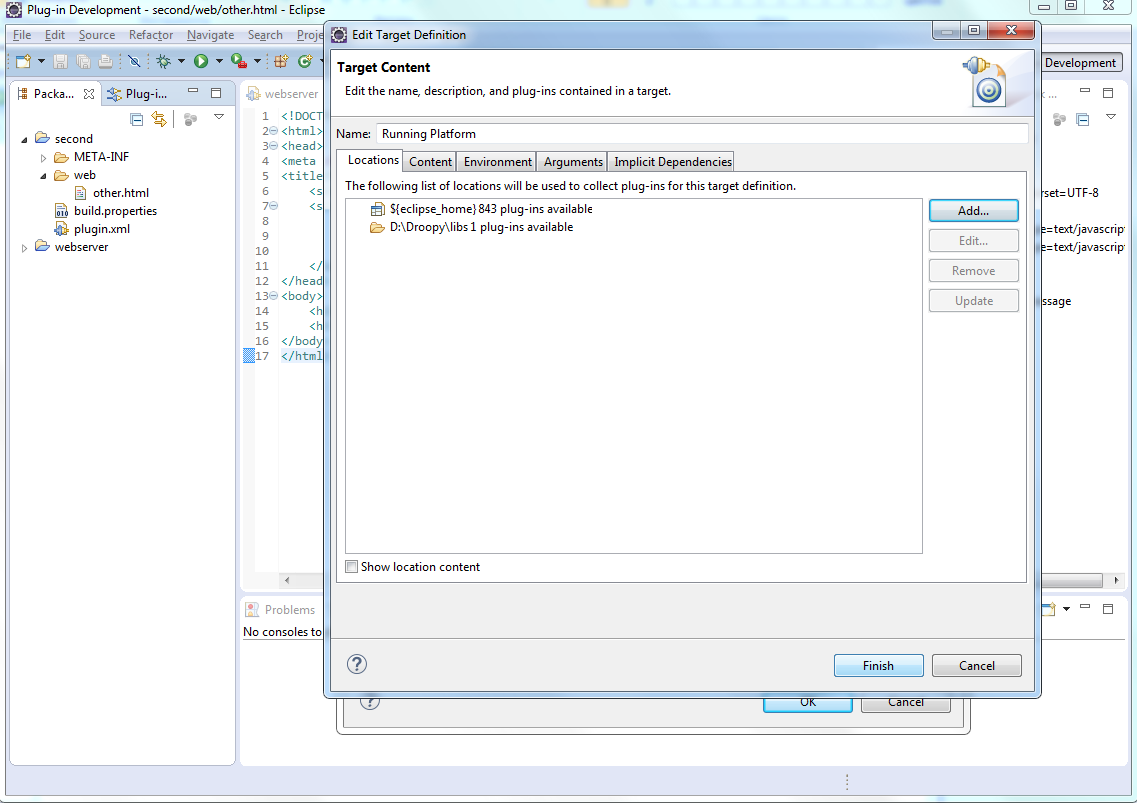
 The content of Target Platform configuration has been updated.
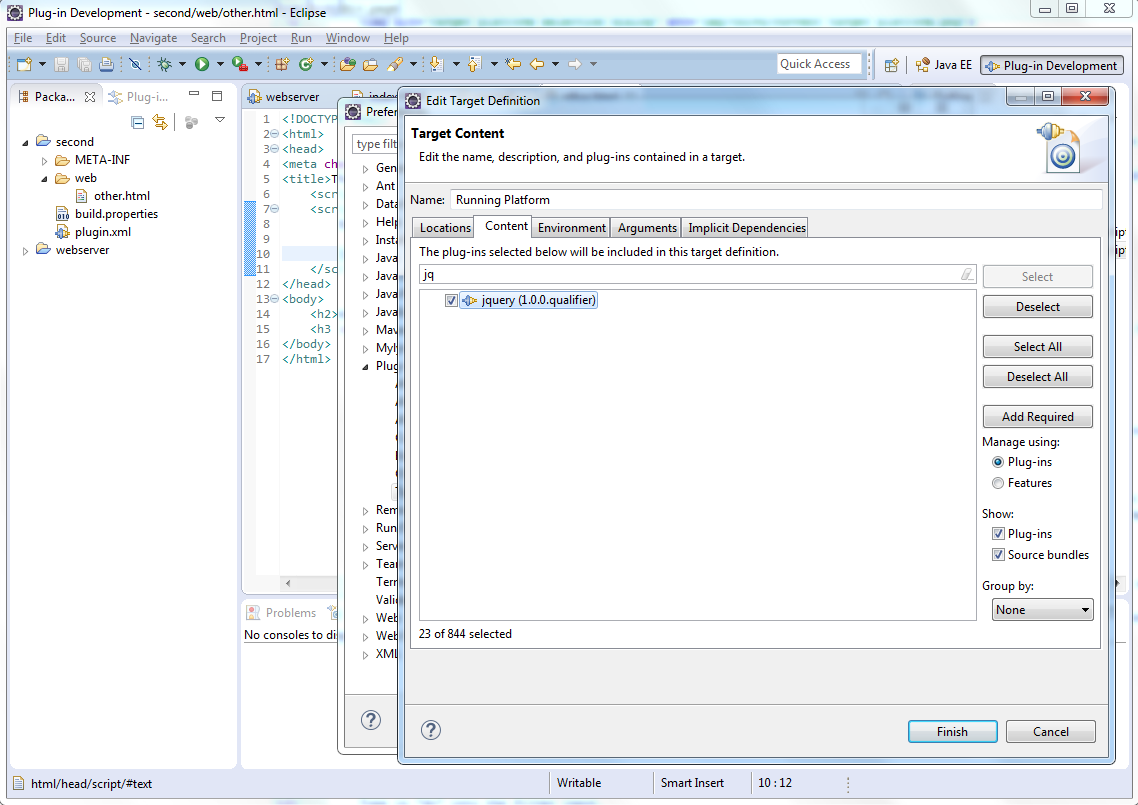
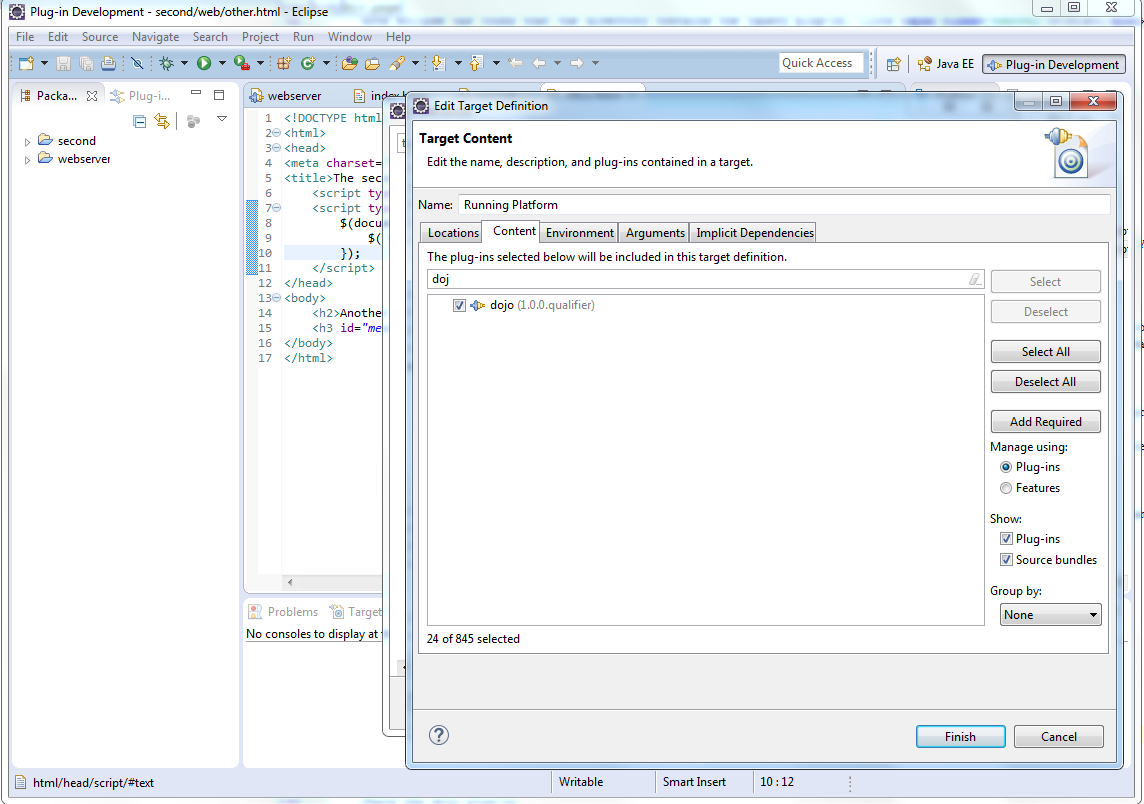
 Switch to Content tab, then type in "jq" in the filter input. We have found our jquery plug-in.
By default, the plug-in was disabled. So we need to check it.
Click Finish.
Switch to Content tab, then type in "jq" in the filter input. We have found our jquery plug-in.
By default, the plug-in was disabled. So we need to check it.
Click Finish.
 Click Apply, then OK.
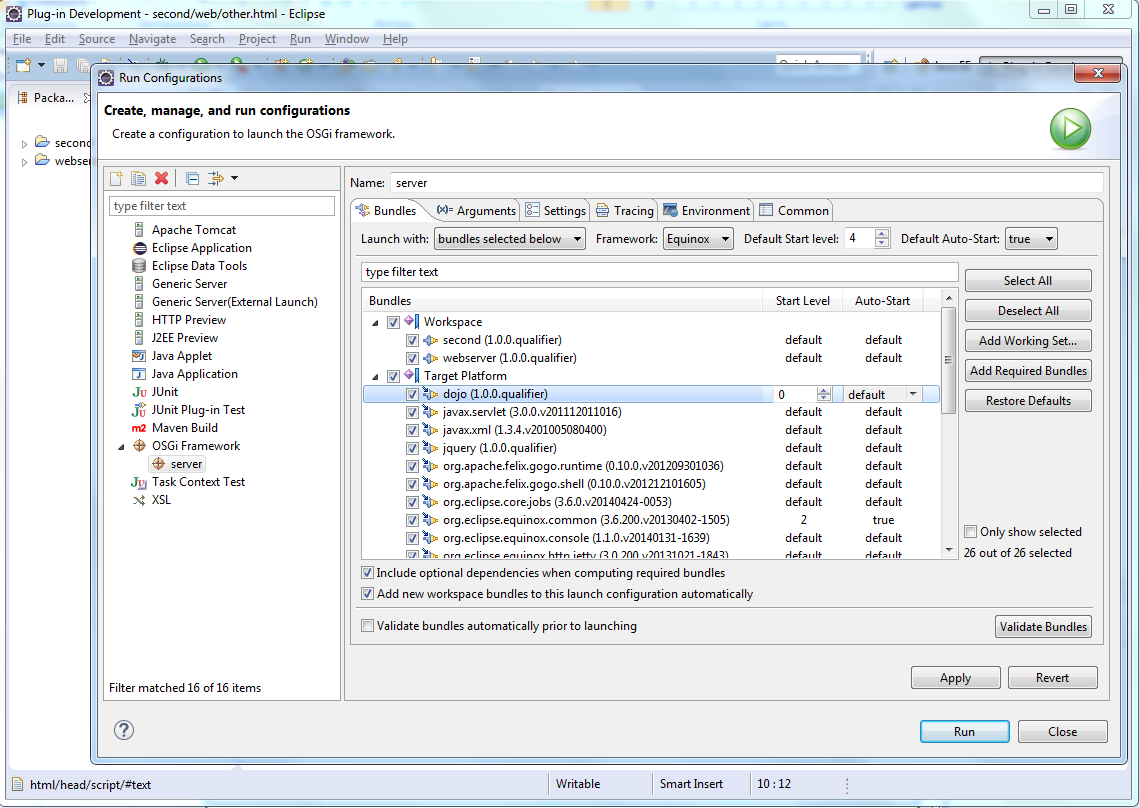
 Open Run - Run Configuration menu to see the plug-ins that are used by the server host.
We should turn on our jquery plug-in. So check it.
Open Run - Run Configuration menu to see the plug-ins that are used by the server host.
We should turn on our jquery plug-in. So check it.
 Our jquery plugin in included in Target Platform. Whenever we start the server, the plugin would be loaded.
Let's start the server again. On the address http://localhost:8080/second/other.html you will see the jquery plugin is loaded into /jquery url.
8. Creating a web plug-in without eclipse.
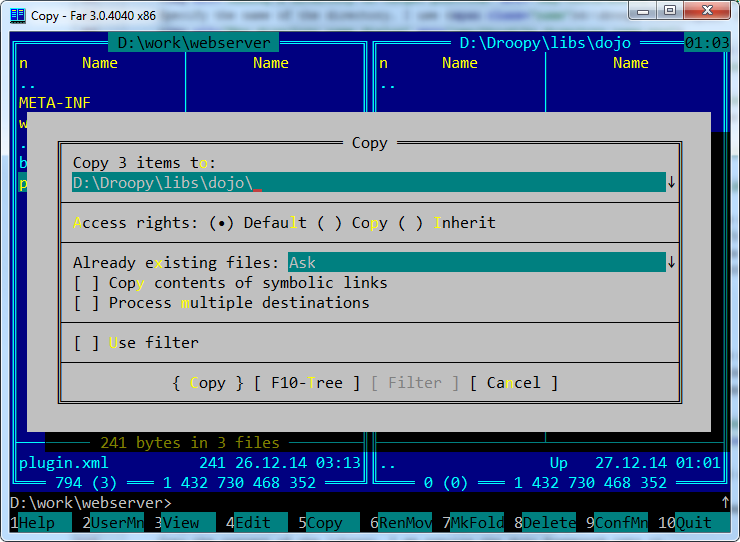
Plug-ins don't have to be jar files. A plug-in could be just an unpacked eclipse project. We can use a directory with a similar to project structure to launch it in the web server. We will create a plug-in in the libraries directory (in my case d:/droopy/libs) by hand. I will use Far Manager to show the copying/editing process. In this example I will add dojo framework into our web space.Create a new directory.
 Copy the content of an existing project into it. This time we'll copy the webserver project. We don't need .project and build.properties files.
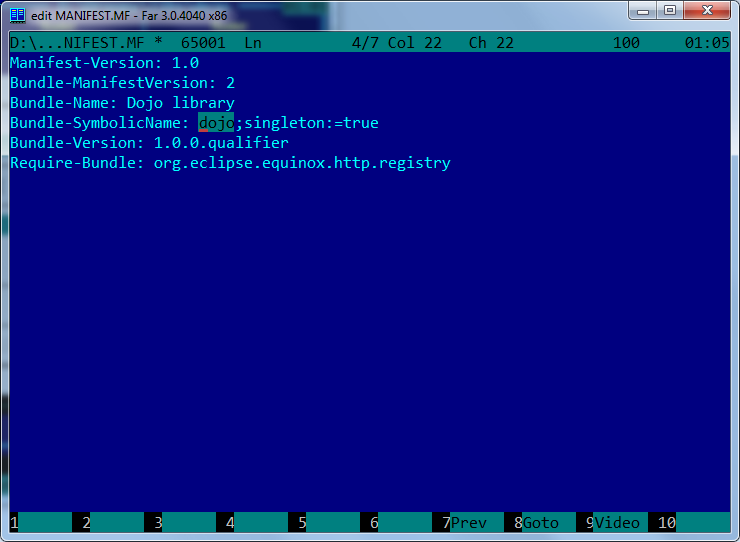
 We should update MANIFEST.MF file of the new plug-in. Change Bundle-Name
and Bundle-SymbolicName values to match the description of the plugin.
I set the description to "Dojo library" and the plug-in name to "dojo".
We should update MANIFEST.MF file of the new plug-in. Change Bundle-Name
and Bundle-SymbolicName values to match the description of the plugin.
I set the description to "Dojo library" and the plug-in name to "dojo".
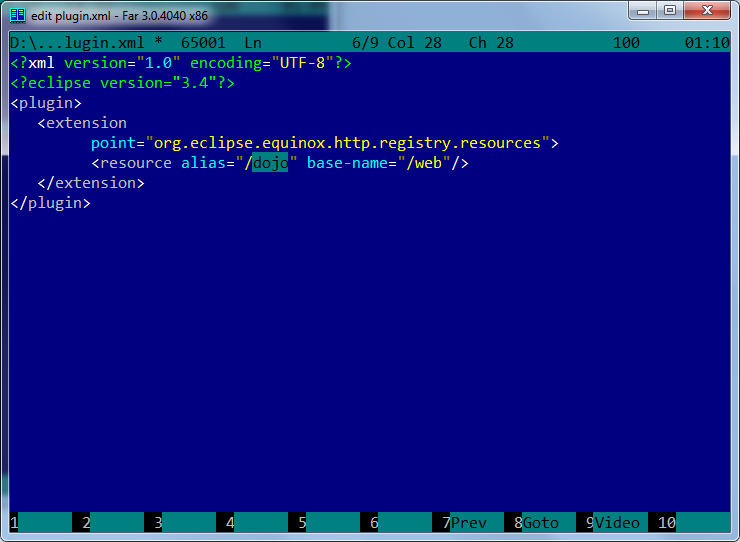
 Change the alias value in plugin.xml file to the url address the plug-in will be mapped to. Let's use "/dojo" address for this plug-in.
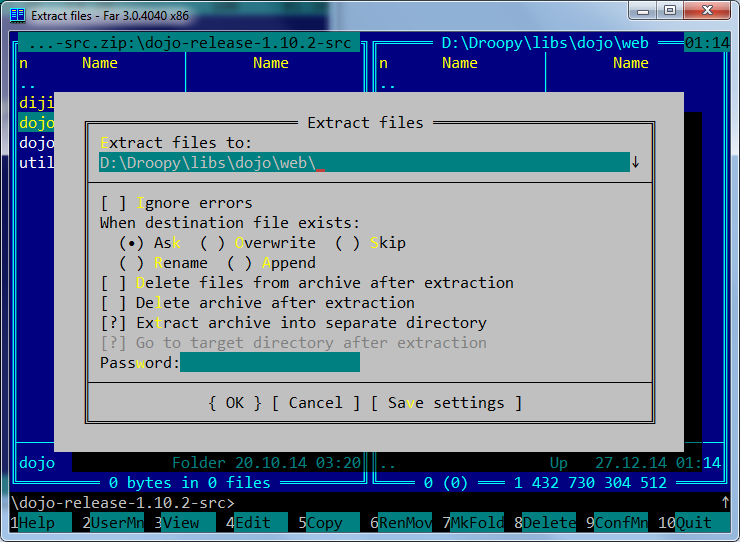
 In the web folder was old index.html file. We don't need it so delete it.
Copy the content of the dojo framework library into the folder.
In the web folder was old index.html file. We don't need it so delete it.
Copy the content of the dojo framework library into the folder.
 Go back to eclipse.
Every new plug-in created in the Target platform folder isn't added automatically to the OSGi host. We should add this newly created web plug-in to our Target Platform by ourselves. There are two places we should enable it - Target Platform and Run Configuration.
Open Window → Preferences menu. Click Edit.
 We should enable the plugin in the Content tab.
Find the dojo plugin and enable it. Click Finish
We should enable the plugin in the Content tab.
Find the dojo plugin and enable it. Click Finish
 Click OK
Open our run configuration: Run → Run Configurations... menu.
Check the dojo plug-in is included.
Click OK
Open our run configuration: Run → Run Configurations... menu.
Check the dojo plug-in is included.
Just remember, after adding a plug-in, enable it at Window → Preferences → Plug-in Development → Target Platform and in Run Configuration. The plugin is disabled by default.
Now we have both jquery and dojo libraries loaded into the web server space. They reside in a separate folder.
You can add as many web plug-ins as you want.
Let's check both libraries are loaded into the server space.
	<script type="text/javascript" src="../dojo/dojo/dojo.js"></script>
	<script type="text/javascript">
		require(['dojo/dom', 'dojo/domReady!'], function(dom){
			dom.byId('message').textContent) += ', dojo version is ' + dojo.version;
		});
	</script>
Then start the server.
 Open the browser again at http://localhost:8080/second/other.html
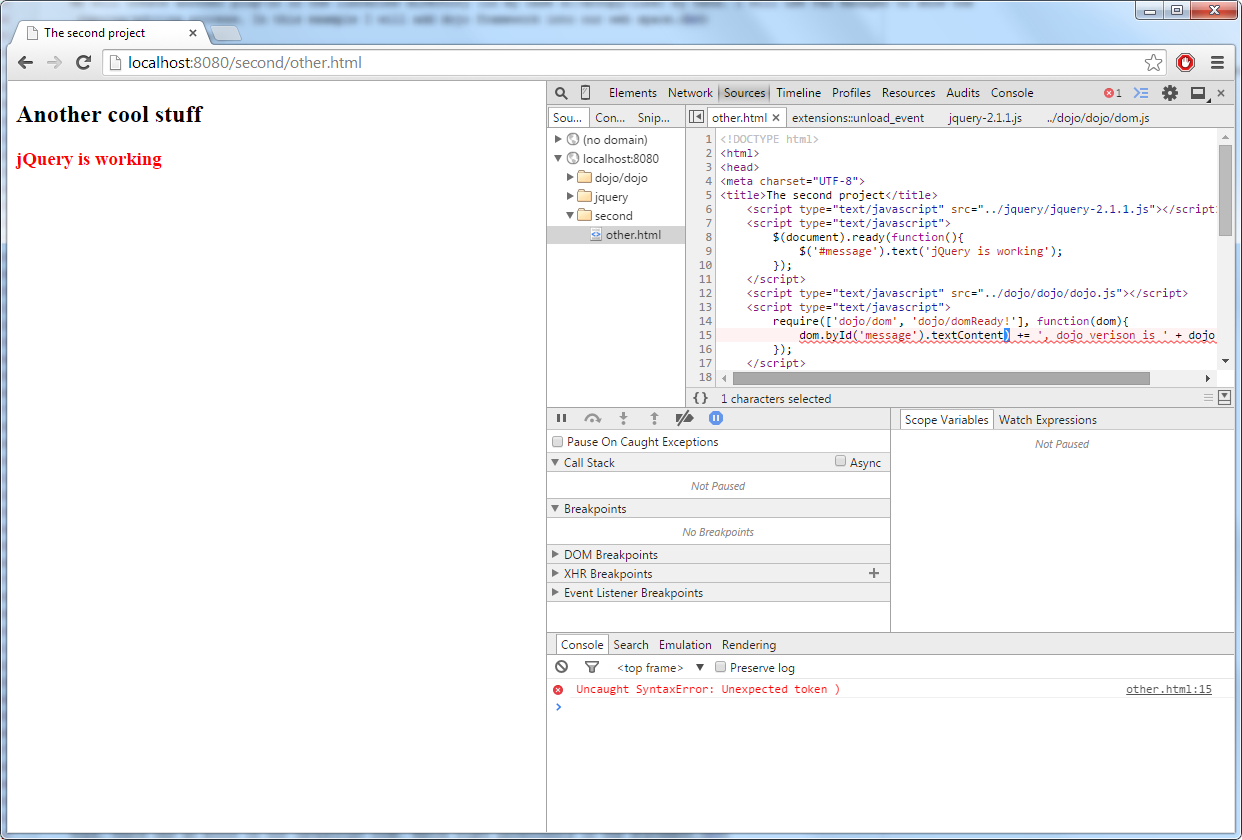 Oops, there was an error in our javascript code. Extra right parenthesis in the statement.
We don't have to stop our server to fix the code. Just update the file, then reload the browser page. It will change immediately.
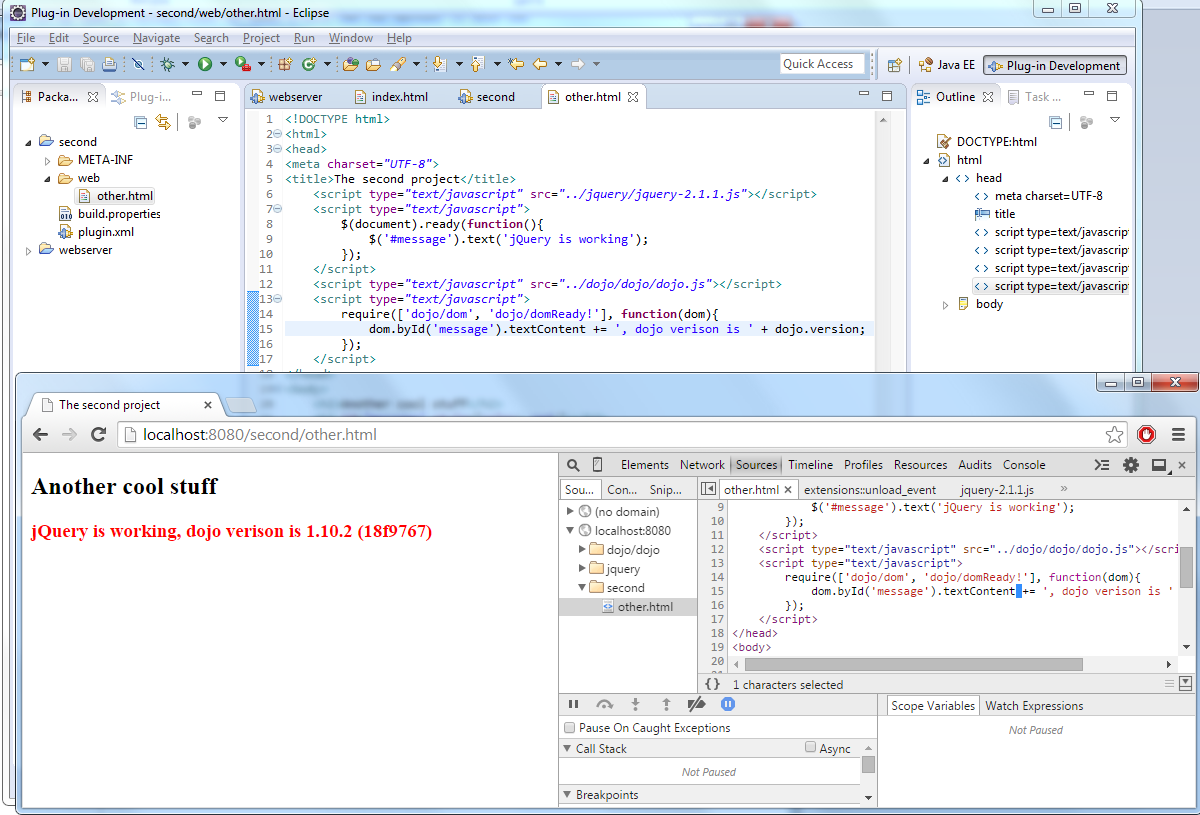 Now you can see everything is working. You can stop the server.
That's all. I think you can setup a web server in eclipse now.